 |
47 (10) (1995), pp. 64-68. JOM is a publication of The Minerals, Metals & Materials Society |
|---|
 |
47 (10) (1995), pp. 64-68. JOM is a publication of The Minerals, Metals & Materials Society |
|---|
Editor's Note: The results presented here are based on research funded by the U.S. Advanced Research Projects Agency (ARPA) through the Investment Casting Cooperative Arrangement (ICCA). The ICCA is a consortium of five companies: General Electric Aircraft Engines, Pratt & Whitney, Howmet Corporation, PCC, and UES. In addition to these five member companies, a number of research institutes are participating members of the program. For more information on the ICCA, refer to Reference 5.
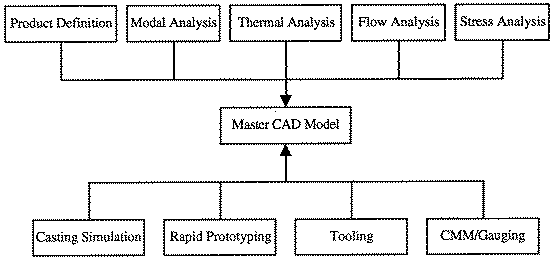
Figure 1. CAD model utilization.
A typical investment-casting process involves the following operations. Core and wax toolings are made from product definitions provided by the engine manufacturer; the tooling may include gating information contributed by the casting house. Wax patterns and ceramic cores are produced by dies. The wax patterns are assembled with other features of the gating system such as the pour cup, downfeed, ring gates, and runners. The resulting wax assembly is dipped into a ceramic slurry and sprinkled with ceramic powder repetitively to form a shell that envelopes the wax assembly. Wax is removed in an autoclave and/or burnout furnace. This produces a ceramic mold, the cavity of which takes on the shape of the original wax assembly. The mold is preheated, and the liquid metal is cast into it. To a certain degree, the proposed model-construction procedure mimics the process of manufacturing a ceramic mold.
Until now, only a portion of the physical phenomena associated with these procedures were analyzed. With only a portion of the physical laws being considered, a complete picture of the resulting casting cannot be accurately obtained. This situation is, however, changing by use of an integrated CAD/finite-element analysis (FEA) approach.5 It consists of seven steps: electronic data transfer; gating library; automatic mesh generation; automatic mold generation; finite-element preprocessing; coupled thermal, fluid flow, and stress analysis; and finite-element post-processing.
From experience, it is always desirable to reduce the number of data translations; therefore, the same CAD software should be used whenever possible by the OEM and supplier. However, if different software packages are already well established in each company, a robust translation protocol should be adopted. Currently, international graphics exchange standard (IGES) protocol is used with only limited success. Due to variations and limitations of IGES, a next-generation intersoftware protocol is being developed called standard for exchange of product model data (STEP), which includes not only enhanced geometric information but also nongeometric information such as assembly, materials, and tolerances.
An example of a solid model is shown in Figure 2. The solid model in this case is a stationary part in the auxiliary power unit of an aircraft engine and is composed of axisymmetric inner and outer shrouds joined by six airfoil struts.
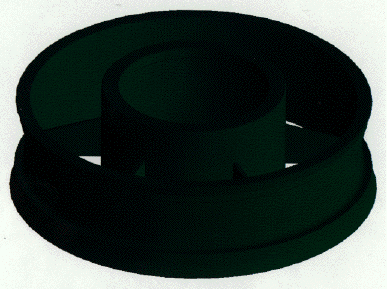
Figure 2. A Unigraphics solid model.
The concept of a gating library is derived from the same operation. Parameterized solid models (primitives) of gating geometries are preconstructed and stored in a directory (gating library). When the CAD model of the component is received from the OEM, the gating primitives are selected and retrieved from the gating library, specifying desired dimensions and locations. These gating pieces are then joined to the solid model of the component using a Boolean operation. This procedure can effectively reduce the solid-model construction time required to modify the OEM model into a casting model when standard gating features are used. Figure 3 shows the final solid model with gating pieces and component booleaned together.
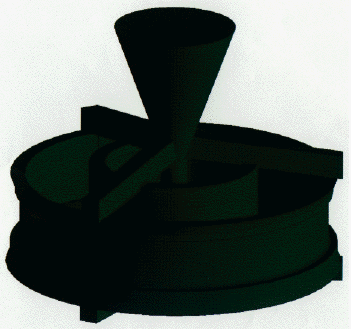
Figure 3. A final solid model.
There are several commercial software packages for automatic mesh generation from a CAD model. When these packages are applied to a complicated geometry, their robustness becomes an issue. Each has strengths and weaknesses, and none consistently succeeds.
In this study, several automatic meshing software packages were evaluated for their ability to produce meshes on Unigraphics solid models—MeshCAST of UES, Finite Octree of Rensselaer Polytechnic Insitute, and P3 of the MacNeal-Schwendler Corporation. MeshCAST uses a combination of Delaunay and the advancing-front method, which requires the generation of a surface mesh before meshing the enclosed region with tetrahedra. Finite Octree uses the octree method to generate linear- or higher-order tetrahedra given a parasolids file. P3 uses a paving/plastering method to generate linear- or higher-order tetrahedra and has direct Unigraphics access. It also requires the generation of surface mesh either explicitly or implicitly before meshing the region with tetrahedra. All three meshers successfully meshed the test model. Figure 4 shows a finite-element mesh of the test geometry generated by MeshCAST. Note that this is the mesh for metal only.
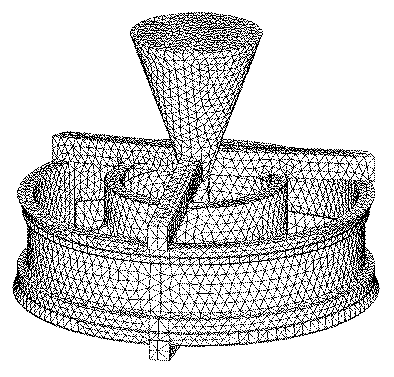
Figure 4. A finite-element mesh of a structural casting.
There are several possible approaches for creating a finite-element mesh of the mold. One is to create a solid of the shell by offsetting surfaces of the CAD solid and then mesh this shell solid using an automesher. The second approach is to create the finite-element mesh of the mold from the surface of the finite-element mesh of the metal, thus eliminating the extra effort of creating a CAD geometry of the shell.
For this study, the second approach was taken. Automatic-mold-generation software was developed, which extracts the triangular surface elements from the 3-D mesh of the metal and creates multiple layers of wedge elements representing the mold. Certain difficulties were encountered, such as how to deal with the issues of element interference at inner corners, the shell bridging problem between adjacent blades, and variable shell thickness. Hence, it tends to generate many elements with shapes too distorted to be used in the analysis, and the resulting mesh must be repaired. Several codes are available with this feature of automatic mold generation (e.g., MeshCAST, Patran, and Hypermesh) and there are in-house codes at casting houses.
Figure 5 shows a finite-element mesh of a mold created using the automatic mold generator. In many cases, radiation-viewfactor calculation is necessary. Consequently, the model should include the environment or furnace geometry. Once the finite-element meshes of the metal, mold, mold wrap, and furnace are created, they are assembled into a final model as shown in Figure 6. It is then ready for the application of boundary conditions, initial conditions, assignment of material properties, numerical parameters, and other conditions.
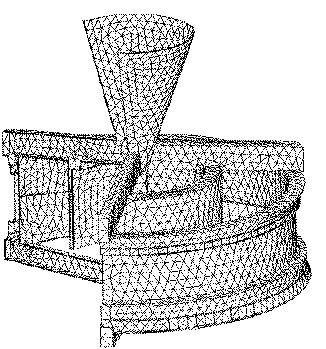
Figure 5. A finite-element mesh of a ceramic mold.
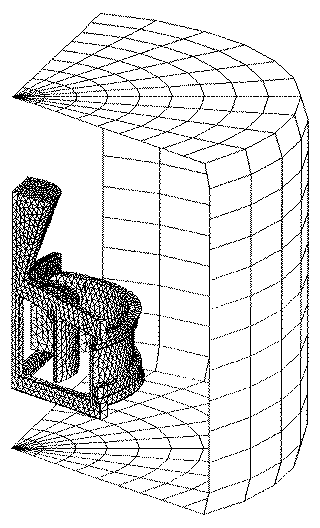
Figure 6. A final finite-element model.
Next, the ceramic mold is transported from the preheat furnace to the casting furnace. At this stage, radiative, convective, and conductive heat exchange starts to occur with the environment. Because of the elevated temperature of the mold relative to its surroundings, radiation is the dominant mode of heat transfer. Since each location on the mold surface sees a different view of its environment, each will have a different rate of heat loss. For example, faces around the outer perimeter of the mold are exposed mostly to the environment, while the view space of those facing the mold centerline see mostly other hot portions of the casting. Consequently, radiative viewfactor calculation is required to accurately account for the heat exchange. The initial mold temperature and heat loss to the environment prior to casting dictate the thermal profiles that exist at the time of pour.
Molten metal is, therefore, poured into the non-uniform temperature mold. It has been found that the pouring profile has a significant impact on the filling sequence and casting defects. The cross-sectional area of the pouring stream, the angle of pour, and the speed of pour all impact the final product. Mathematically, this information serves as an inlet-velocity-boundary condition. This velocity profile, which changes from pour to pour, is a process variable that is difficult to model numerically. Although the mass-flow-rate profile is obtainable, other variables, such as the location where the metal hits the pour cup, remain unknown. Inlet velocity is assumed for the fluid flow calculation.
During and after mold filling, solidification starts to take place. The energy content of the metal continually decreases by heat conduction with the cooler mold and by radiation from the mold surface and exposed metal in the pour cup. Depending on part geometry, solid metal starts to pull away from the mold or press against the mold. This changes the heat-transfer mechanism across the metal/mold interface. Therefore, heat-transfer coefficients (HTCs) between the metal and the mold are not constant and must be calculated from either first principles or an empirical approach.
In the later stage of solidification, the majority of metal in the product component is solidified, while some portion of the gates are still in liquid or mushy states. This solid/liquid interaction creates a significant technical challenge for a stress analysis of the casting. In the present case, certain simplifications were made. For example, the mold is assumed to be rigid and only metal nodes on the interface can freely move away from the interface since the ceramic mold is relatively brittle compared to the high-temperature metals. This becomes the boundary condition for the stress calculation of metal.
Material properties of the metal, IN718, and the ceramic mold were generated2 and applied to the model. After the preprocessing, the finite-element model was solved using the software ProCAST, which is tailored to casting simulation.
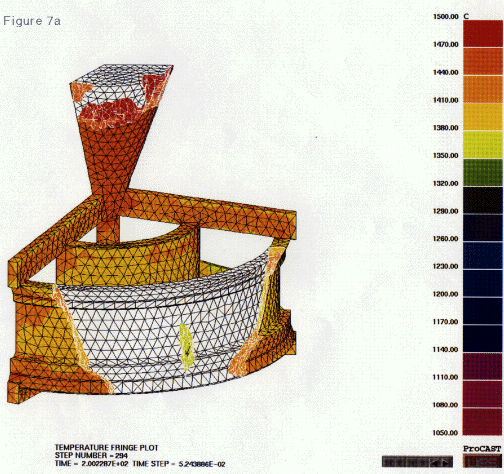
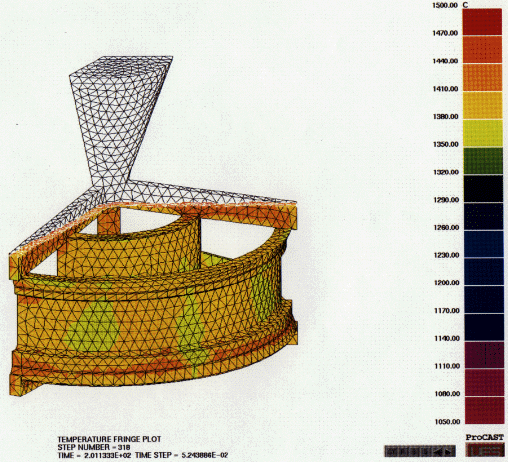
Figure 7. Mold-filling sequences at (a) 5.23 seconds after pouring and (b) 6.13 seconds after pouring.
Figure 8 presents the prediction of shrinkage hot spots. By making the solidified metal transparent, users can easily see the remaining liquid pool. An isolated region of liquid thus suggests a potential hot spot and macroshrinkage indication. No hot spot was predicted other than that in the gates.
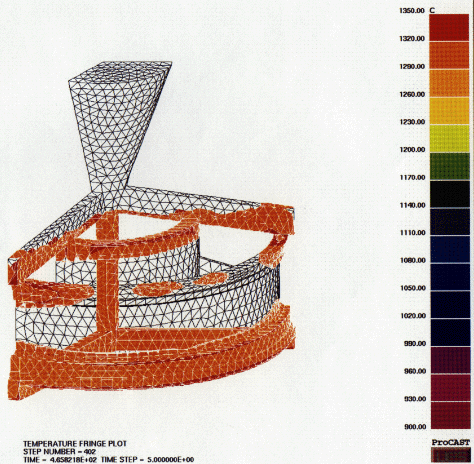
Figure 8. Prediction of a hot spot.
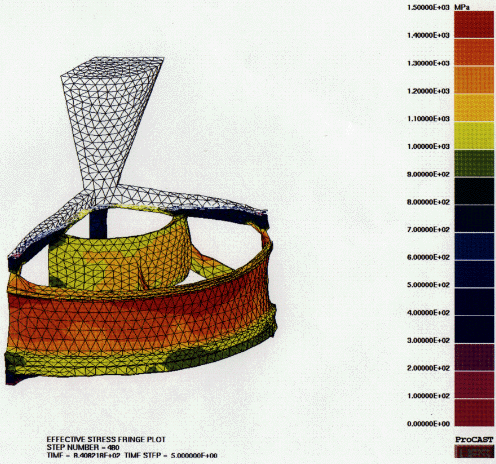
Figure 9. Effective stress and deformation at 645 seconds after pouring.
R. Kelly Foran earned his M.S. in mechanical engineering at Texas Technology University in 1984. He is currently a project engineer in the process modeling group at Howmet Corporation.
Albert M. Hines earned his M.S. in engineering science and mechanics at the University of Tennessee in 1990. He is currently a project engineer in the process modeling group at Howmet Corporation.
Paul R. Aimone earned his M.S. in materials science and engineering at Drexel University in 1986. He is currently a project engineer in the process modeling group at Howmet Corporation.
For more information, contact J.S. Tu, Howmet Corporation, 1500 S. Warner Street, Whitehall, Michigan 49461; (616) 894-7829; fax (616) 894-7826; e-mail jtu@howmet.com.
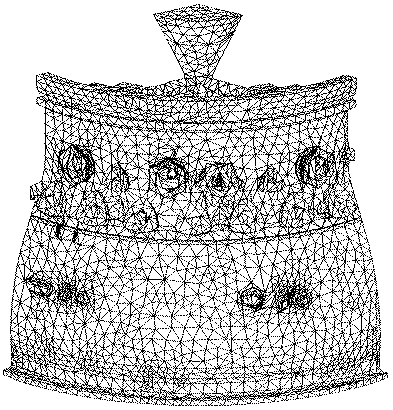
Figure A. A finite-element mesh of an equiaxed structural casting.
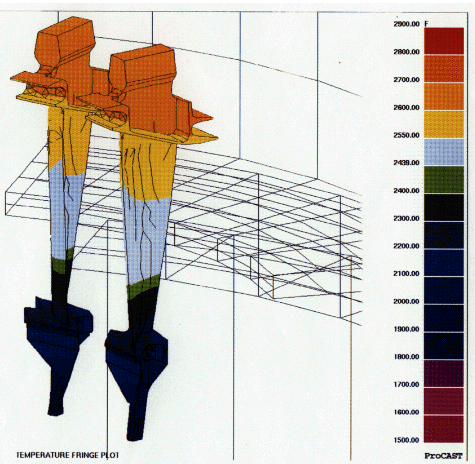
Figure B. A mushy-zone profile of single-crystal airfoil casting.
It is interesting to note that the solidus isotherm located next to the baffle shows a relatively flat profile, and the liquidus isotherm in the upper chamber slants toward the center of the casting mold. This is because in the upper chamber the mold exterior is hotter than the mold center due to the induction heating, while in the lower chamber, the mold exterior is cooler than the mold center because of the room-temperature environment. A flat isotherm indicates that its temperature gradient is in the vertical direction and is aligned with the stacking axis of the airfoil.
At each location, the temperature gradient varies with time; however, what is important to a solidification process is the temperature gradient at solidification. McLean6 has shown that a high-temperature gradient provides favorable casting conditions for single-crystal growth. This is also supported by the empirical defect map,1,2 which suggests that as the temperature gradient becomes higher, the casting window grows wider, or the process becomes more robust. In fact, this is exactly what happens to the actual casting; the process produces high-yield castings. Note that the temperature gradient is a vector quantity that possesses both direction and magnitude. The direction of interest should be in the intended growth direction (i.e., stacking axis). Otherwise, a high gradient on the lateral direction will encourage growth along the secondary dendrite direction and produce scrap castings.
One criticism of casting simulation is its accuracy. Often, an inaccurate model will mislead the user and produce costly results. Therefore, a model should be validated to establish its credibility. By comparing the calculated temperatures and thermocouple measurements, we found the calculated temperatures to be close to the experimental data and within the tolerance of thermocouple measurements.
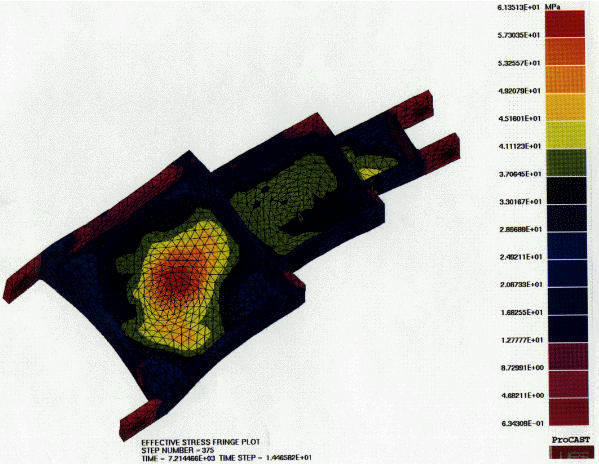
Figure C. Effective stress and deformation of a tri-box casting.
Direct questions about this or any other JOM page to jom@tms.org.
| Search | TMS Document Center | Subscriptions | Other Hypertext Articles | JOM | TMS OnLine |
|---|